Water damage is one of the most famous as well as expensive nightmares for every homeowner. Moreover, what typically starts as a peaceful rainwater runoff can drastically transform into foundation cracks, expensive repairs, and even soil erosion over a period of time. Therefore, if your home also appears to be pooling in water after every storm, then it’s high time to start inspecting the foundation for potential risks. Nonetheless, the affordable yet effective solution for this chaos – high-quality concrete splash blocks.
Furthermore, in this guide, we’ll thoroughly discuss how uncontrolled runoff leads to common water damage foundation issues and how a DIY concrete splash block can help protect your home without spending a fortune.
Why Is Water Runoff a Serious Foundation Threat?
Rainwater from your roof is usually funneled through gutters and downspouts; however, have you ever given it a thought, like, “Where does it even go next?” Well, if that water drops directly at the base of your home, it eventually starts weakening the entire soil supporting the foundation. Moreover, over a period of time, this results in poor foundation water drainage, cracks in the concrete, and even severe structural instability – the worst combination for expensive repair.
For instance, repeated rainfall – a simple weather change – may cause foundation erosion from rain, washing away soil and enhancing pressure against foundation walls. Thus, in short, without proper runoff control, the potential risk only grows over time, not the other way.
What Is a Concrete Splash Block?
A concrete splash block is basically a solid channel placed meticulously beneath a downspout to guide rainwater safely away from the foundation of your home. In contrast to various plastic alternatives, DIY splash blocks for downspouts effortlessly stay in place and resist weather damage, along with ensuring long-term protection.
How Do DIY Concrete Splash Blocks Solve the Problem?
Here’s how DIY concrete splash blocks solve the problem:
1. Reliable Water Diversion
A properly angled splash block effectively directs water several feet away from your home to minimize saturation near the foundation, along with improving overall foundation water drainage.
2. Long-Lasting Strength
Concrete withstands heavy rainfall, freezing temperatures, and even harmful UV exposure far better in comparison to various plastic or vinyl options.
3. Custom Fit for Every Downspout
Understanding how to make a concrete splash block helps you to easily create multiple identical blocks that fit seamlessly beneath each downspout.
4. Cost-Effective Protection
DIY solutions help homeowners prevent water damage foundation issues without harming their well-planned budget over high-end drainage systems or contractor fees.
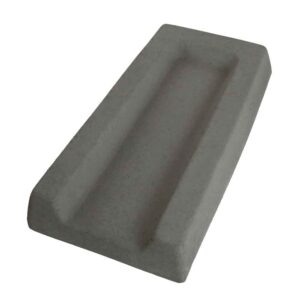
How to Make a Concrete Splash Block?
Creating your own perfect splash block is way easier than many homeowners imagine.
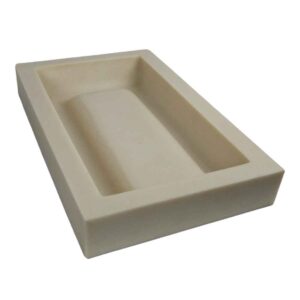
Step 1: Select the Right Mold
A premium-grade rubber mold for concrete splash blocks is crucial for this process. That’s why Stone Master Molds provides highly durable, flexible molds that don’t require any release agent – a hassle-free way to save both your time and effort.
Step 2: Prepare the Concrete Mix
Use a high-quality outdoor-rated concrete mix and blend it with utmost care to a thick yet pourable consistency. Plus, you should always avoid overly watery mixes, as they can significantly weaken the final product.
Step 3: Pour the Concrete
Slowly pour the mix into your mold, then gently tap the sides to remove any air bubbles to ensure a seamless finish and consistent strength.
Step 4: Allow Proper Curing
Let the concrete cure fully for almost 24-48 hours before demolding, as proper curing boosts long-term durability while ensuring optimal resistance to cracking.
How to Install a Splash Block Correctly?
Knowing how to install a splash block is an extremely crucial step to define its overall effectiveness. Here’s how you can do it:
- Place the splash block directly under the downspout
- Angle it slightly away from the home
- Make sure water flows at least 2-4 feet from the foundation
- Set it on compacted soil or gravel to prevent potential shifting
Final Thoughts
Although foundation repairs are quite expensive, preventing them doesn’t have to be, all thanks to DIY concrete splash blocks – simple solutions that ensure long-term protection when made and installed properly. Plus, with the right mold, proper concrete mix, and strategic placement, you can effectively protect your precious home from water damage in the long run.
Ready to safeguard your foundation the smart way? Check out professional-grade molds from Stone Master Molds now to start building your own highly durable splash blocks!
FAQ’s
1. Can water damage a foundation?
Yes, continuous exposure to water over time significantly weakens concrete and eventually results in soil movement that compromises foundation stability.
2. How to stop water from pooling near the foundation?
Incorporate a combination of clean gutters, properly positioned downspouts, and concrete splash blocks to effectively redirect the water away from the foundation.
3. How to divert water away from the foundation?
Carefully installing a concrete splash block beneath each downspout helps guide water safely away and also eliminates potential chances of saturation near the base of your home.
4. How does foundation erosion from rain happen?
Over time, rainwater repeatedly hitting the same area basically washes away supporting soil, resulting in erosion and uneven foundation pressure.